This Easy Nutter Butter Spooky Halloween Cookies Recipe is perfect for peanut butter lovers who want a spooky treat or need a dessert to bring to a Halloween party! They just might be your favorite Halloween treat.
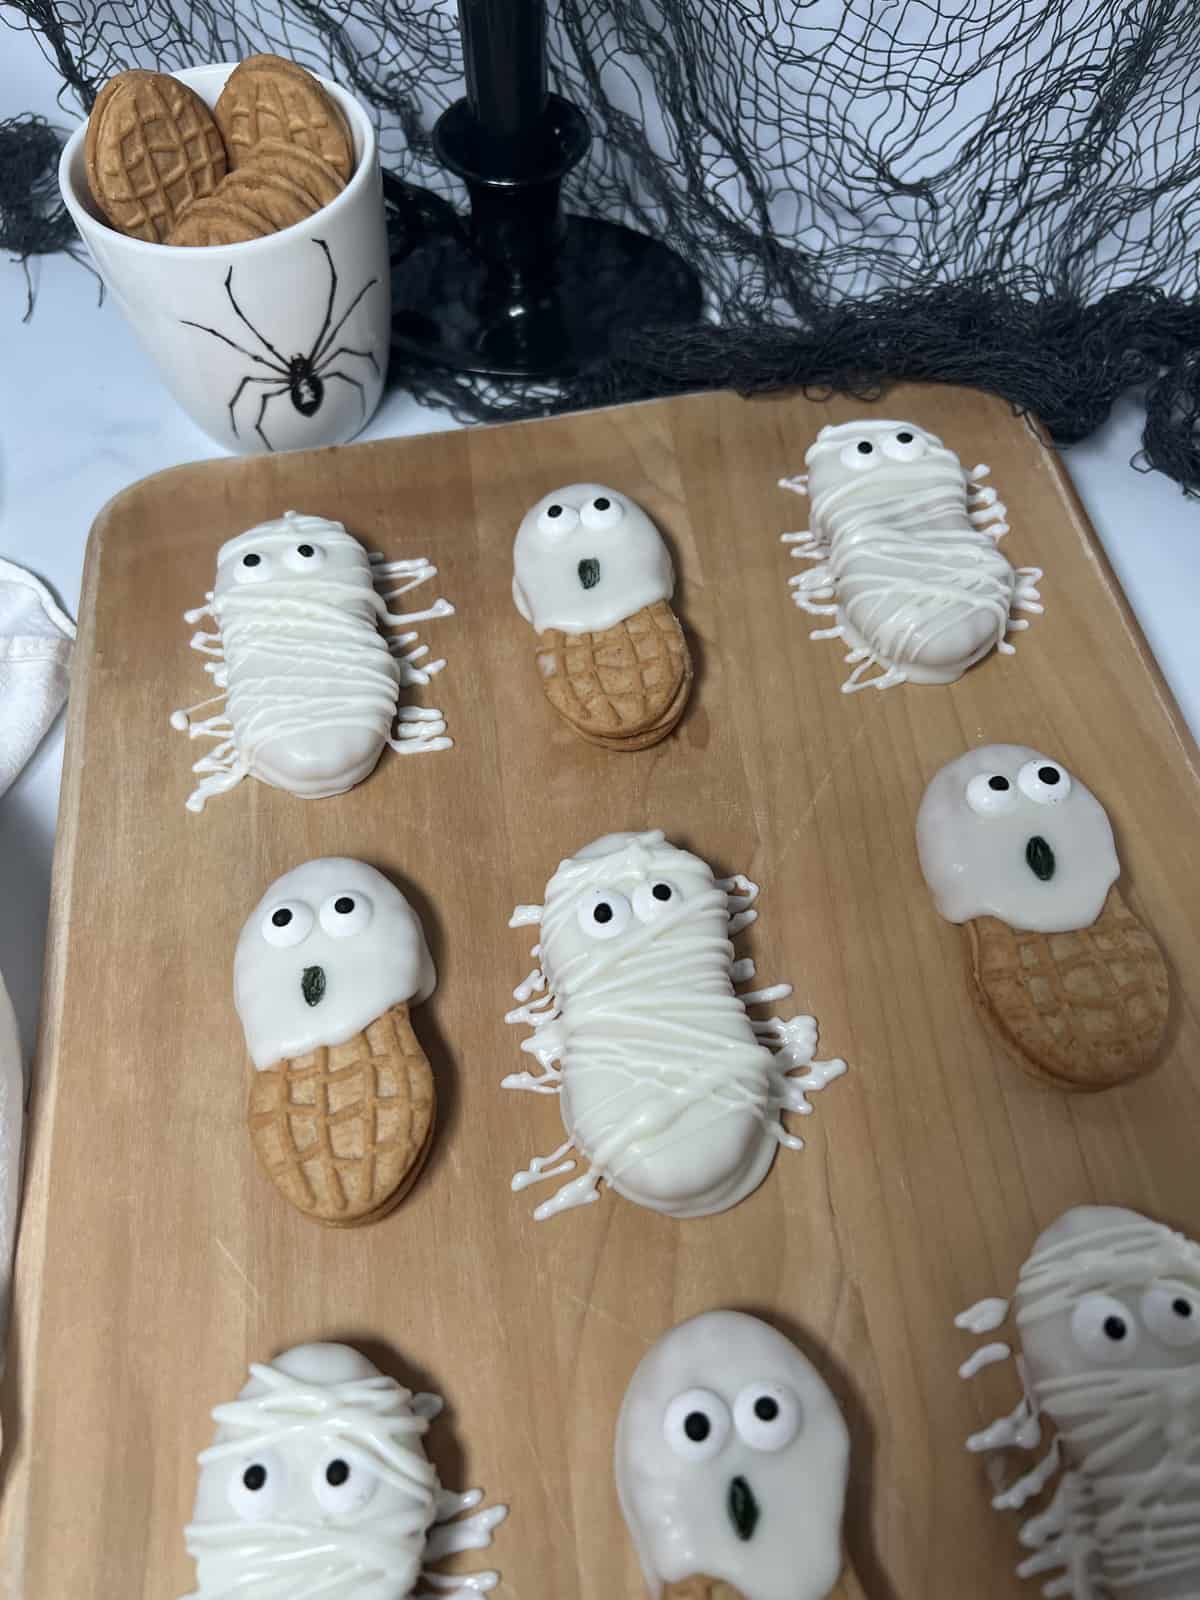
Feeling spooky and want to make an easy treat for Halloween? Then these cute Halloween cookies are perfect for you! All you need is four simple ingredients: Nutter Butter sandwich cookies, white chocolate of your liking, candy eyes and a food safe black pen! This non bake dessert has the best peanut butter flavor and is social media post worthy!
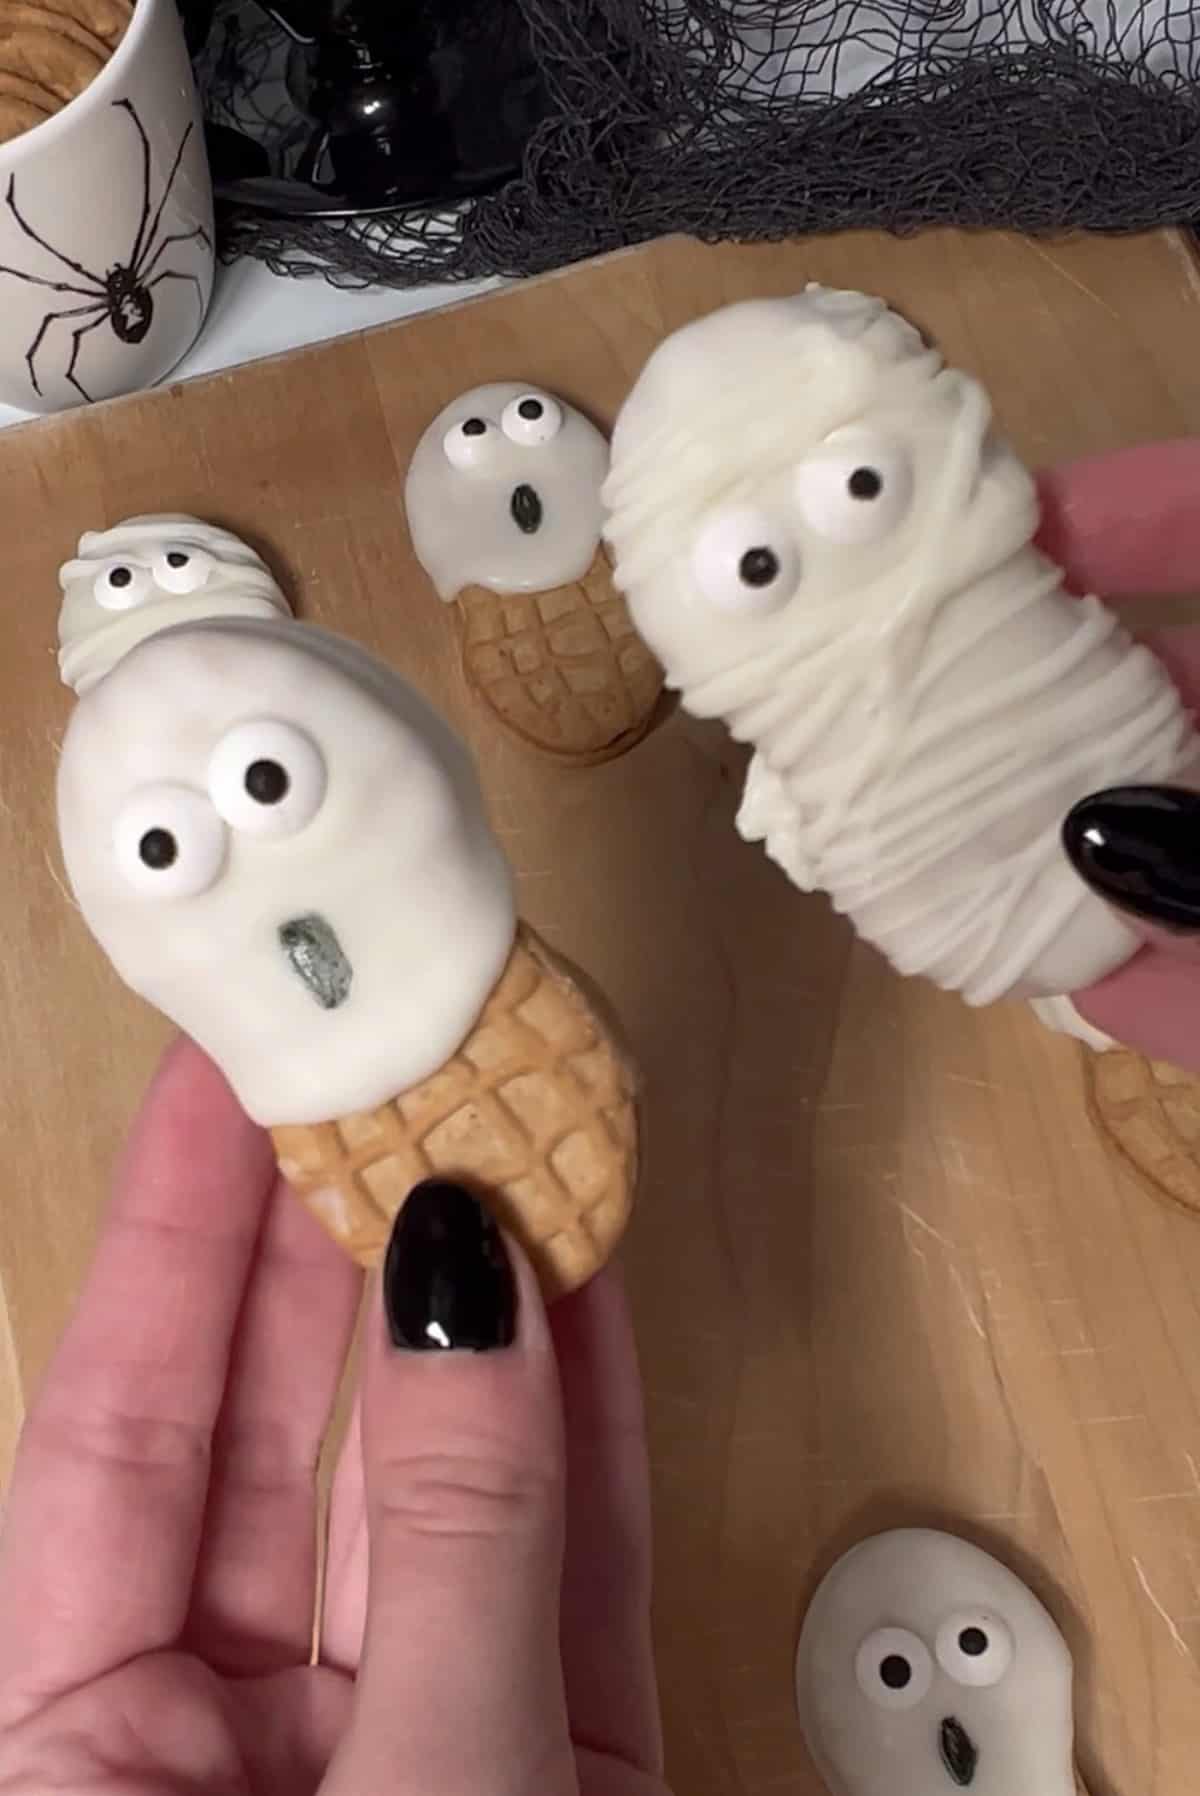
WHY I LOVE THESE easy cookies for Halloween
• It's quick and easy because you can use store-bought cookies! You don't have to bake cookies for this recipe!
• These easy Halloween treats are great for young children during the spooky season. A fun activity to make with the kids.
• The white chocolate with a crunchy, creamy filling cookie. peanut butter cookie sandwich is to die for!
• They are the most adorable Halloween cookies and perfect for Halloween parties! Add this recipe to you fun Halloween treats list.
• This is one of my favorite easy Halloween cookie recipes and they're so much fun to make.
• A wonderful addition to any Halloween festivities.
WHAT YOU NEED
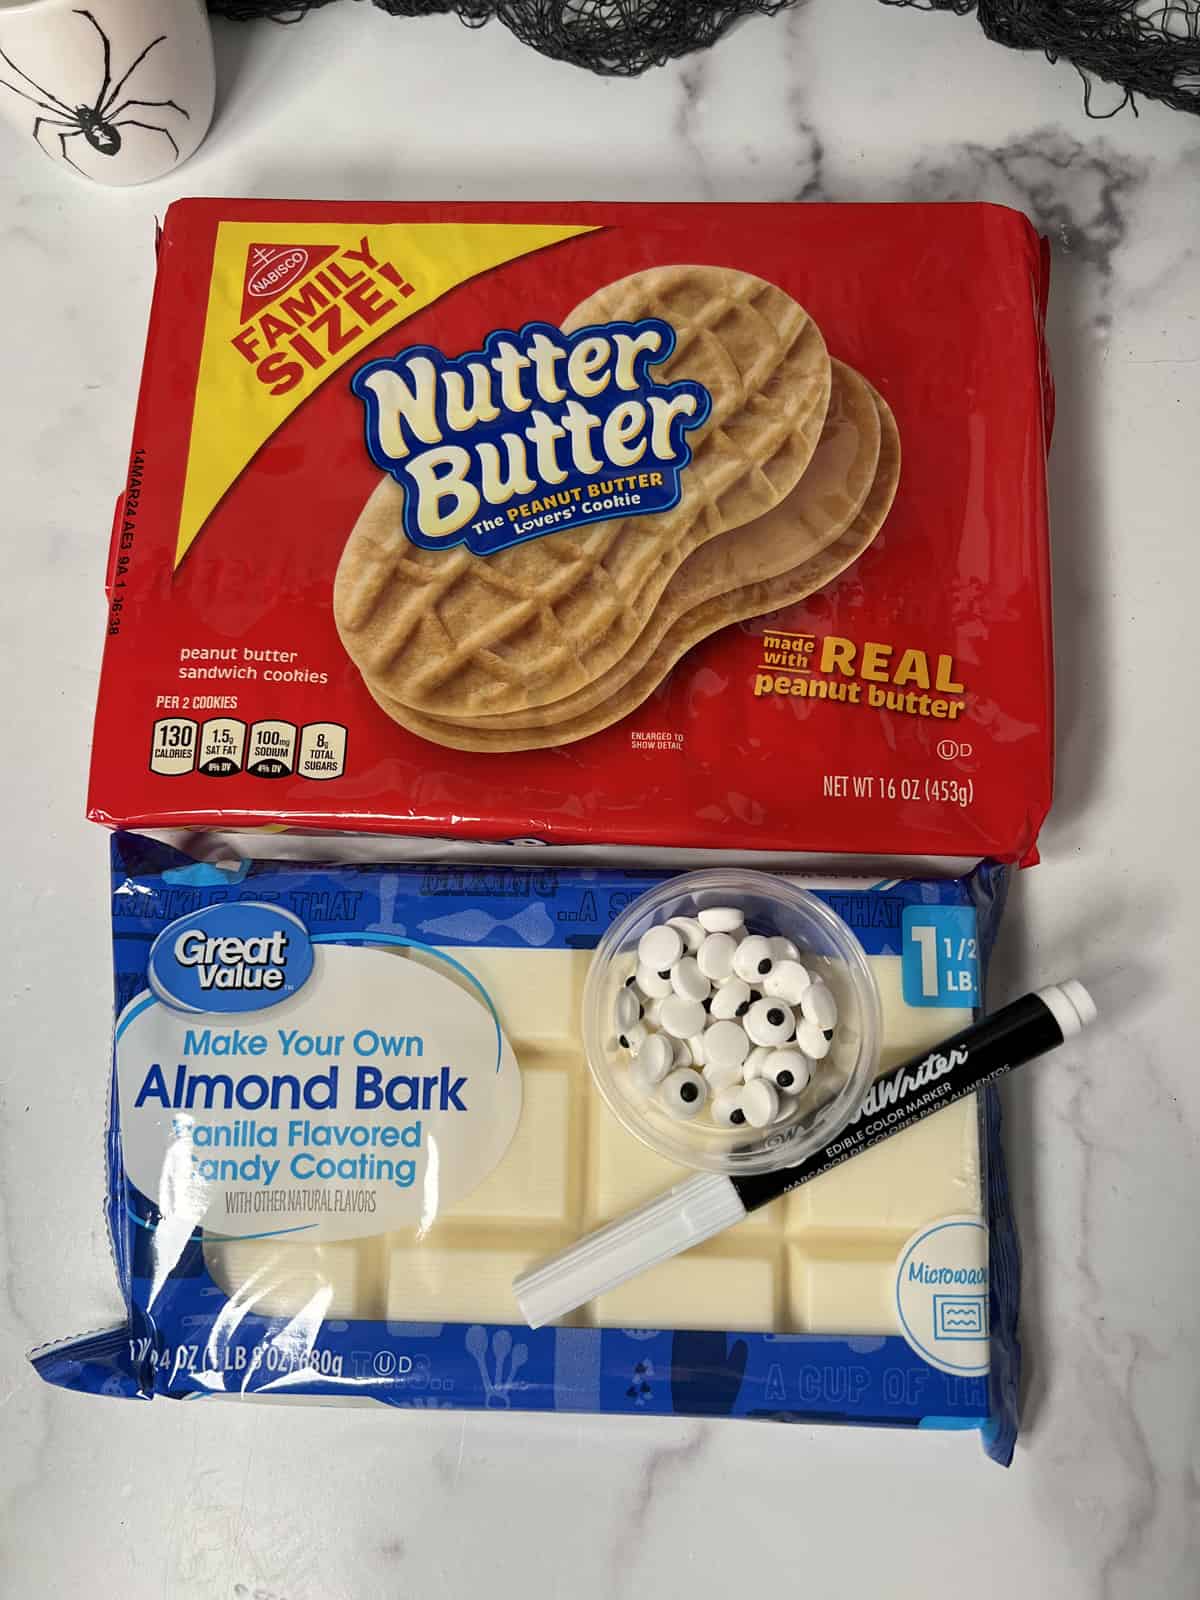
INGREDIENT NOTES
• Original Nutter Butter Cookies: Pick up some nutter butter cookies from you local grocery store!
• White Chocolate: I used White chocolate almond bark because it is easier to use and still tastes delicious, so I recommend that. However you can also use white chocolate chips if you like!
• Candy Eyes: You can purchase these from Walmart, Target, your local craft store or Amazon!
• Black Food Safe Pen: Go to Walmart or your local craft store and pick up one of these babies from the baking aisle. You can also order it on amazon.
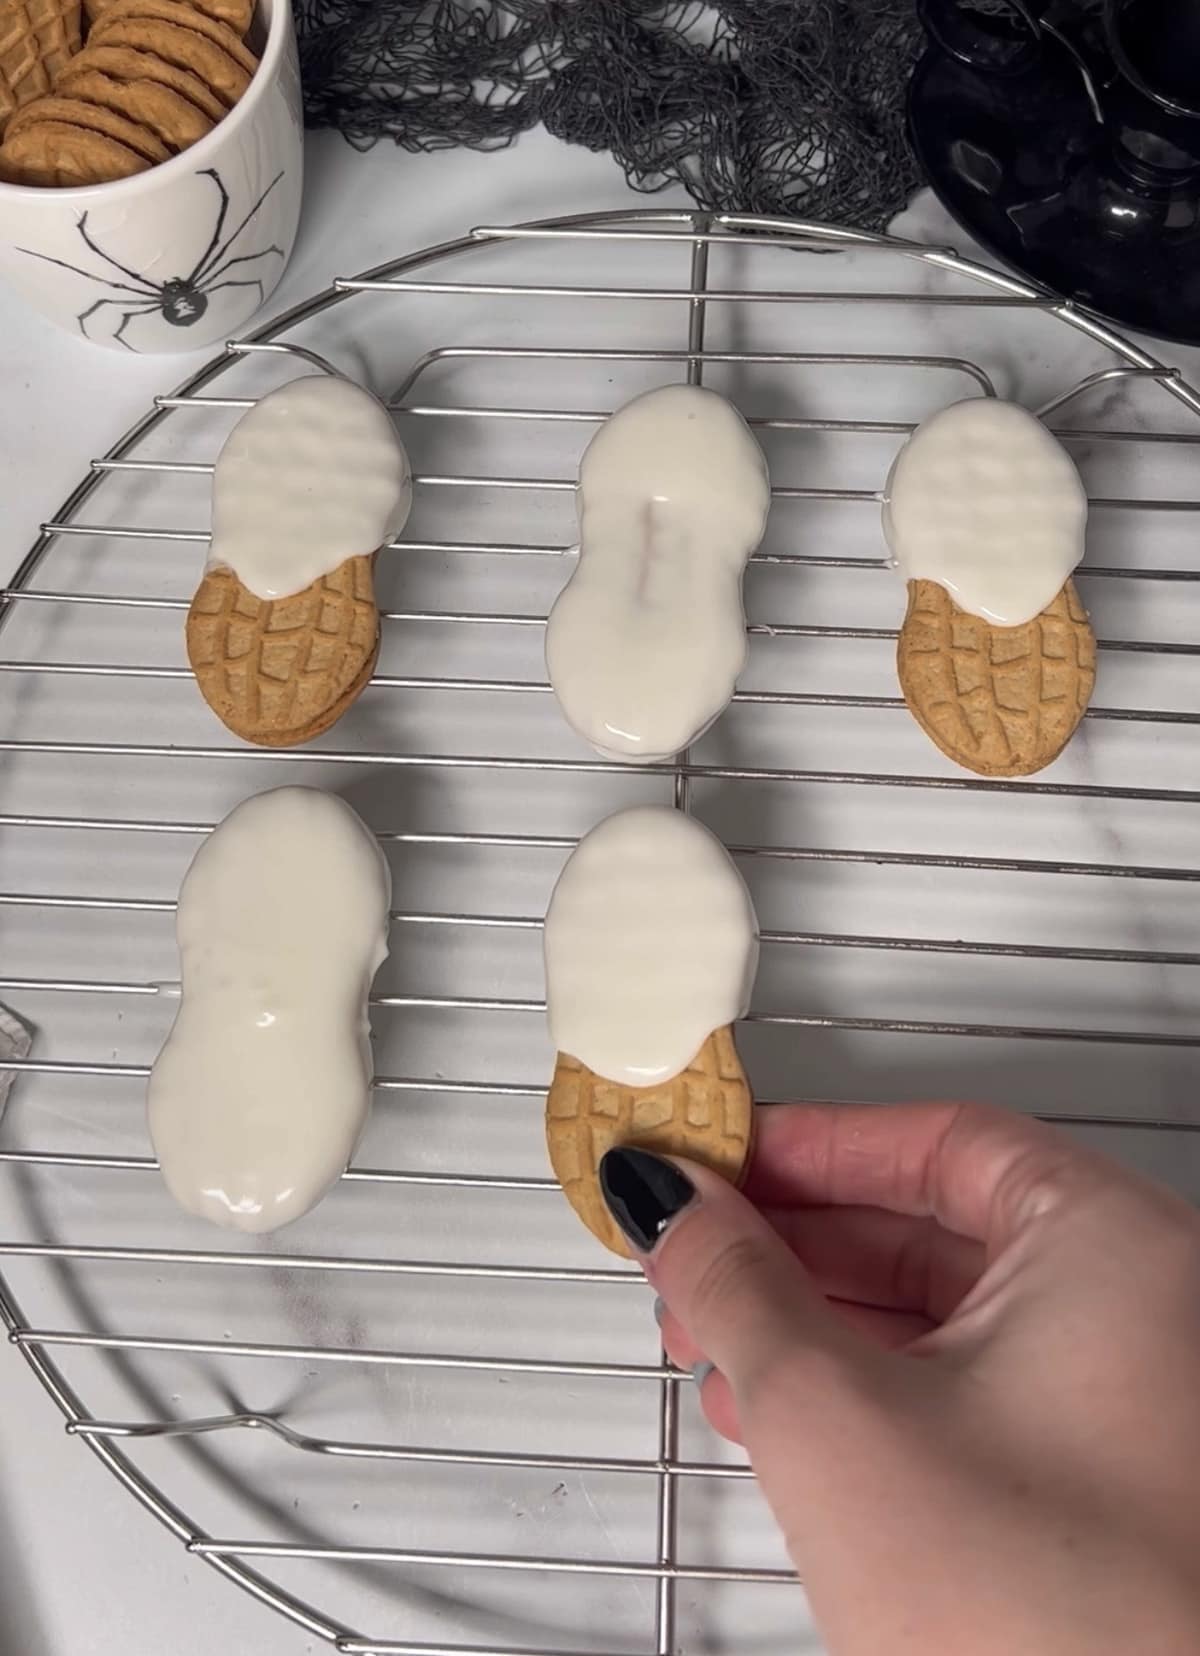
HOW TO MAKE THESE Easy Halloween Cookies
Step 1: In a medium bowl that is microwave safe, melt your white almond bark according to the directions on the package. I melted about half the block of almond bark (extra for the mummy cookies). Once it is completely melted and smooth it is ready to use. Have your nutter butters out and prepared for the next step.
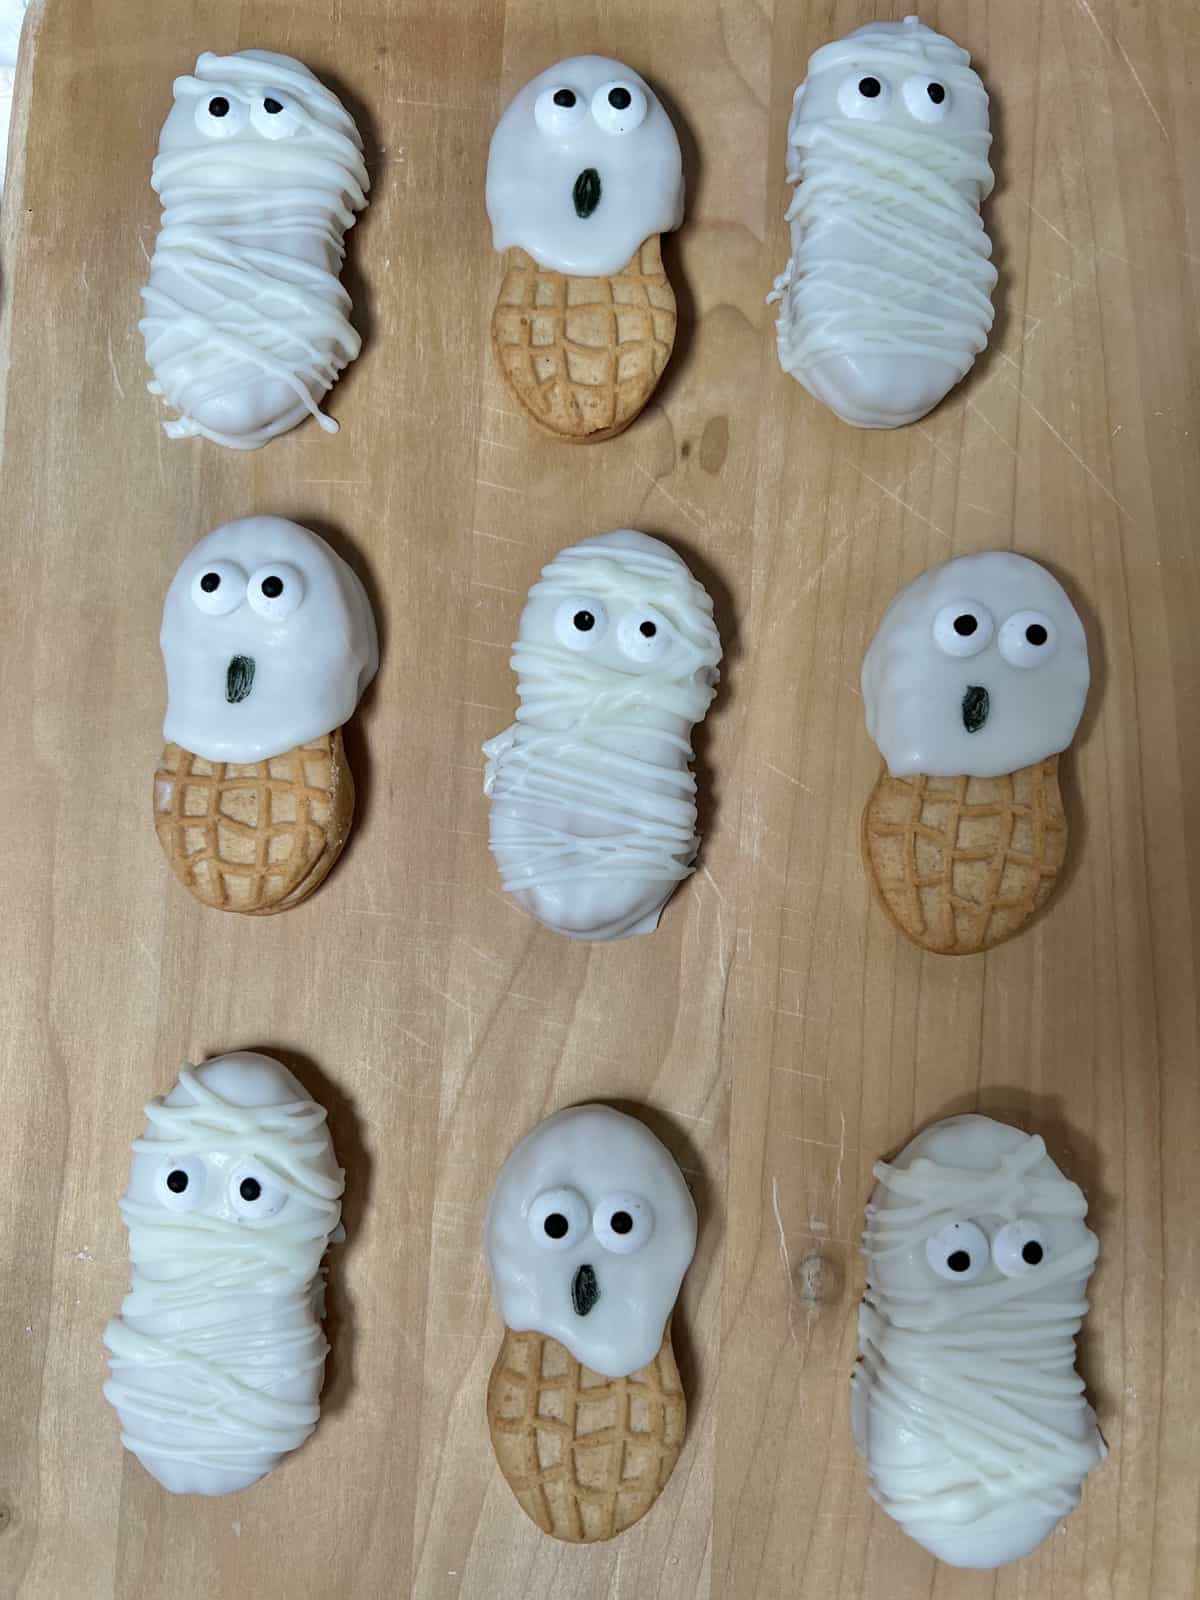
Step 2: For the ghost cookies, dip half of the cookie into the white chocolate. I try to get both sides dipped and when I take it out I put it right side up and I let some of the white chocolate drip to get the ghost effect. Place on a cookie sheet or plate with parchment paper and add the candy eyes.
Step 3: However, for the mummy cookies, drop the whole cookie into the bowl and cover it all with the melted chocolate. Usually I use a fork to pick it up, then tap a few times on the side of the bowl to get rid of excess chocolate and to give it a nice smooth look on top. Place on parchment paper with your ghost cookies and add the candy eyes at the top ish of the cookie.
Step 4: Pop your mummy/ghost cookies into the fridge until completely cooled and harden. I would leave it in for about 15 minutes then just check just then with placing your finger on top to see if gooey or harden.
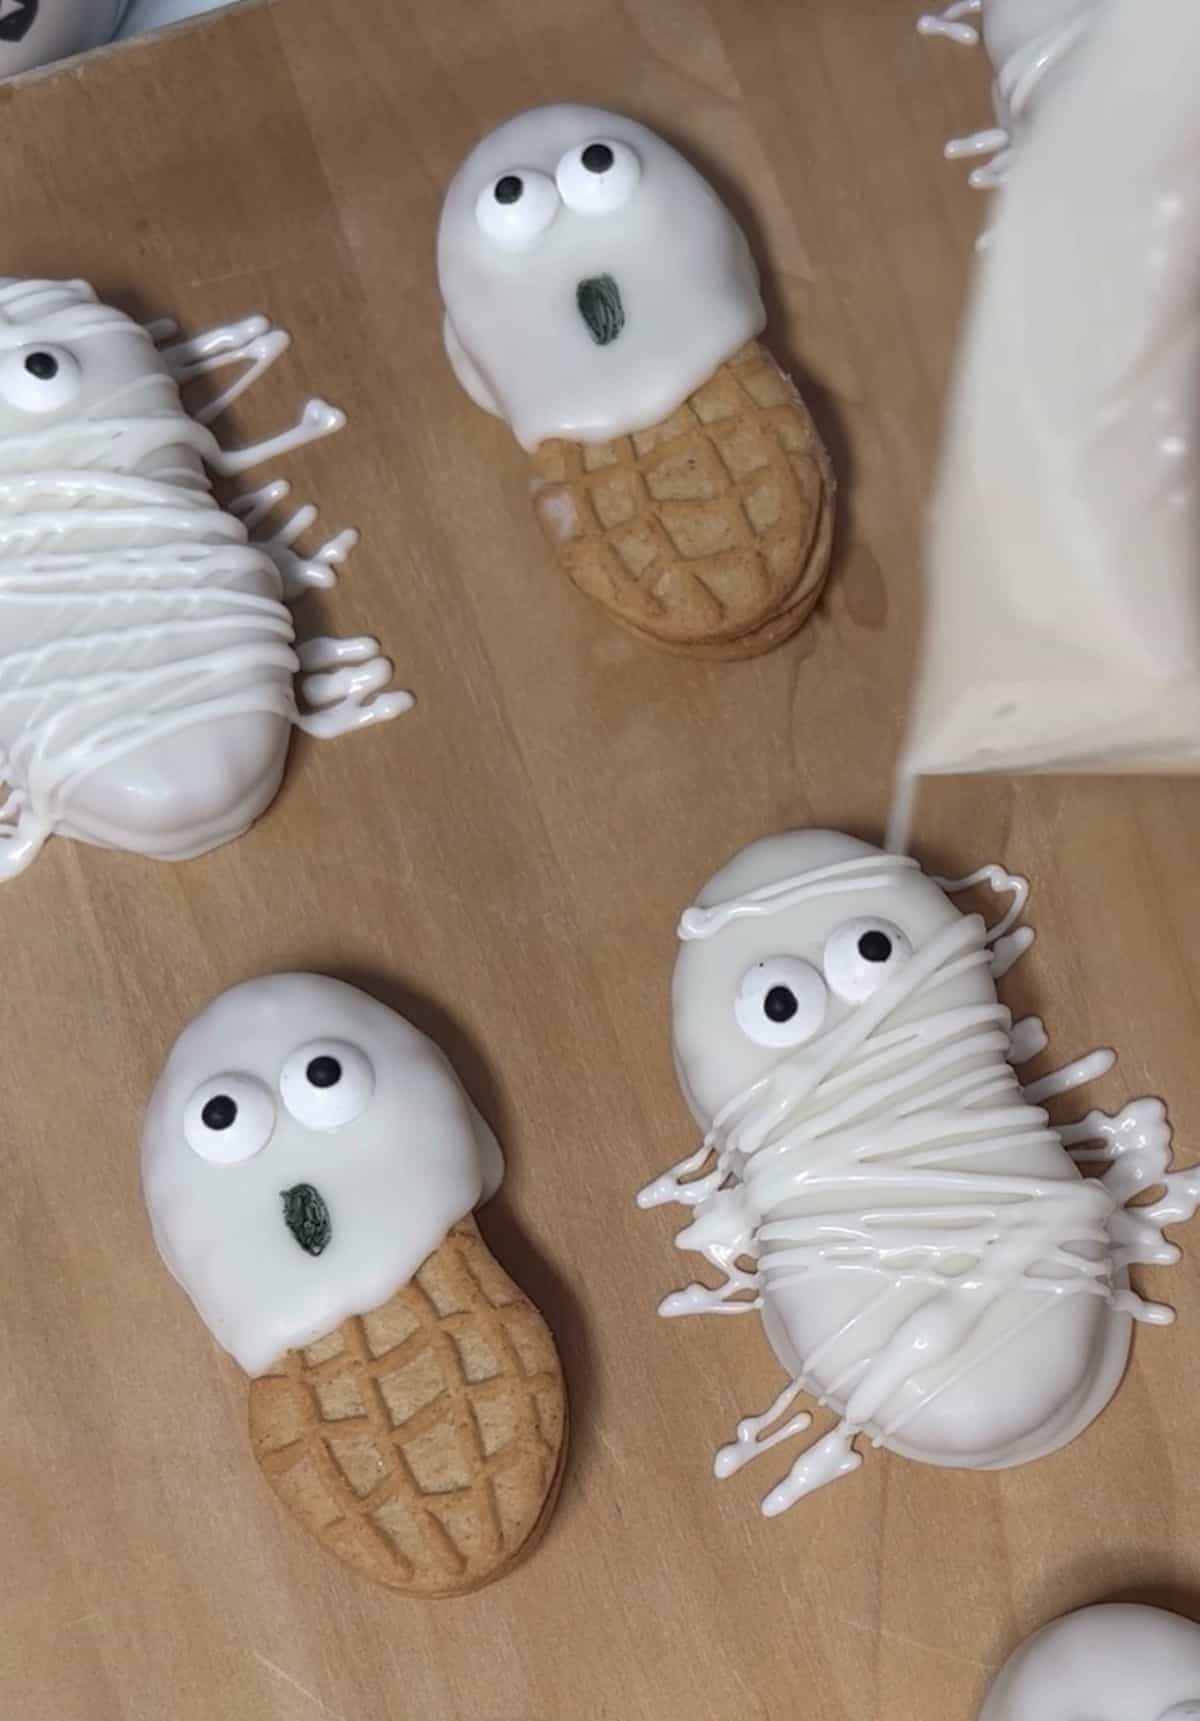
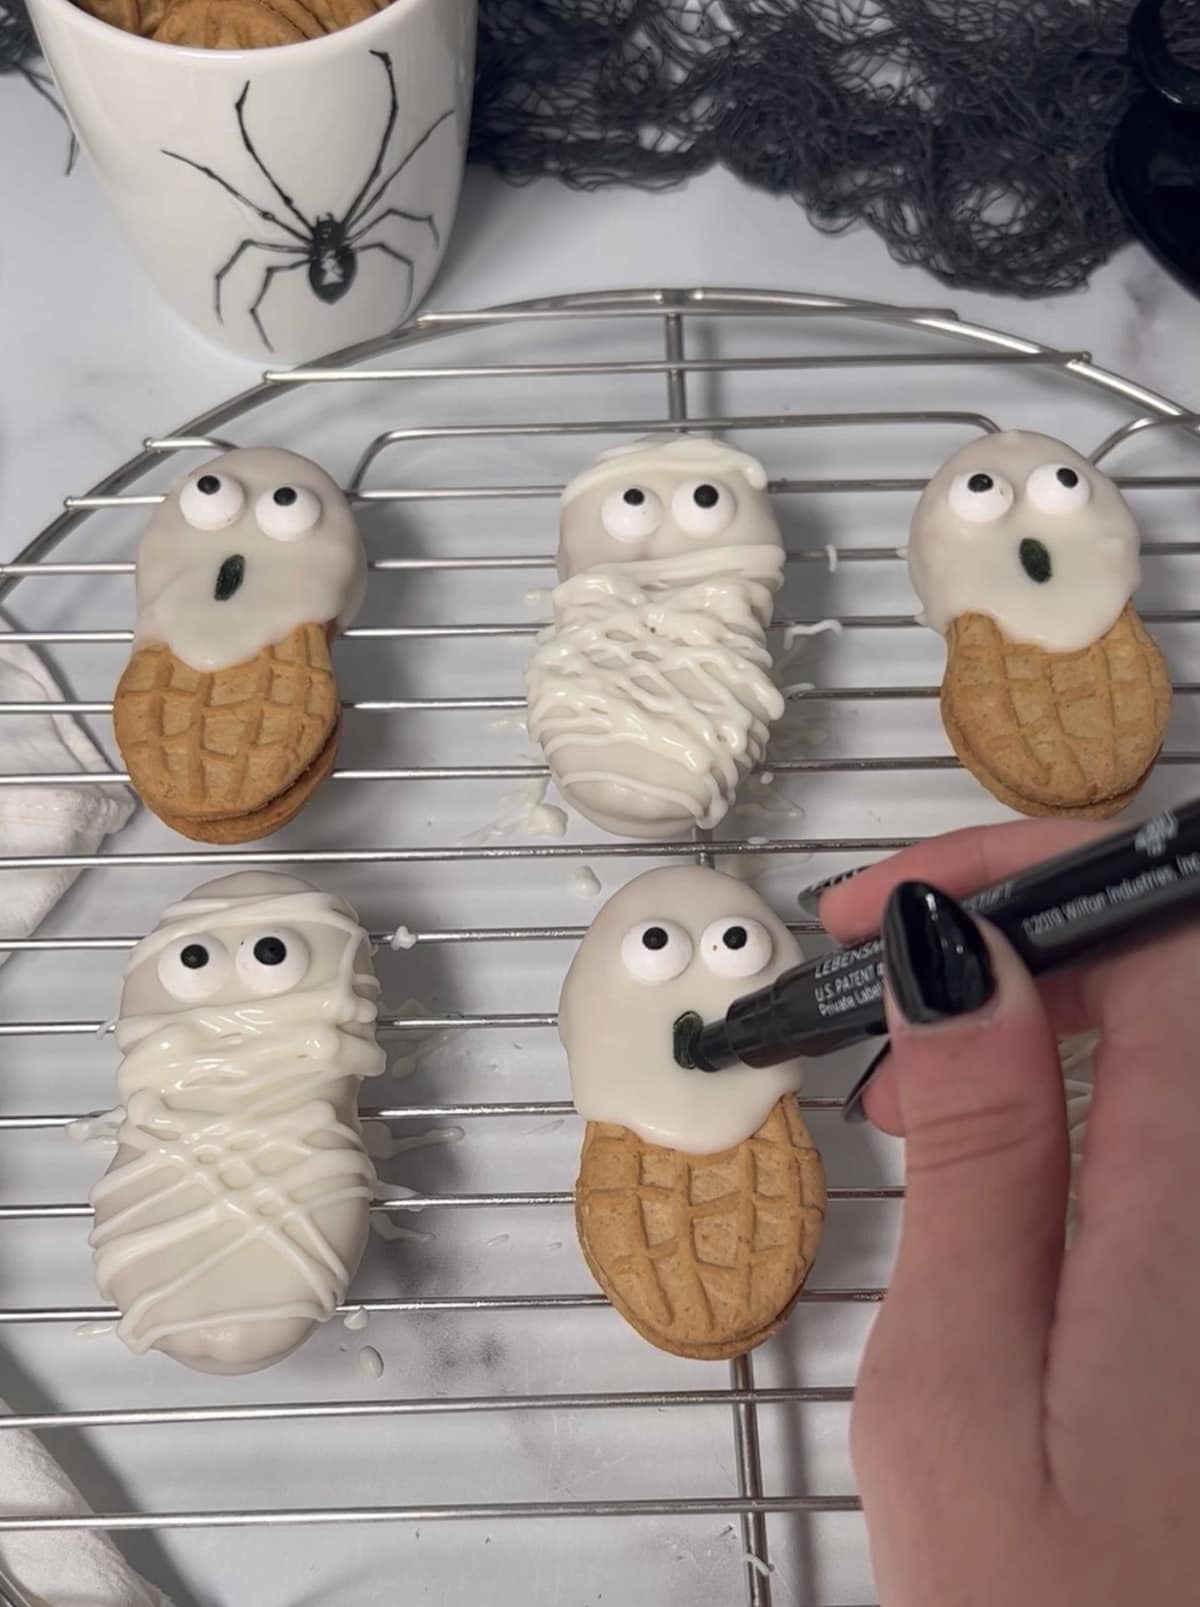
Step 5: Once thoroughly cooled, use whatever access white chocolate you have left or microwave some more. Pour the remaining white chocolate into a zip lock bag. Zip up the bag with no air in it and cut a very tiny hole at the corner where all the chocolate is. Test to see if it is a good pouring consistently and the hole is big enough (you can also do this whole process with a piping bag if that is easier). Once it looks good drizzle all over the fully covered chocolate cookie avoiding the eyes. (For an easier tutorial check out the video at the bottom). For the ghost draw on a black ghost oval mouth with the black food safe pen.
Step 6: Put back in the fridge again for about 10 minutes to let the mummies harden and enjoy!! Now you have the perfect Halloween treat to share with friends and family. Store them in an airtight container or a zip top bag at room temperature or in the fridge for a week!
Check out the full recipe below on the recipe card for more details!
QUICK TIPS
• When you dip the mummy cookies into the white chocolate, use a fork to take it out and tap it on the edge of the bowl a few times to get some excess chocolate off and to give it a nice smooth coat on the top of the cookie.
• Leave the cookies in the fridge to cool for at least 15 minutes to ensure they are completely hardened.
• When adding chocolate into your piping bag or zip lock bag there's an easier way to do pour the white almond bark into the bag. Do this by grabbing a smaller cup and putting the bag inside, then opening it up to fit around the rim of the cup. Then pour your white chocolate into the cup.
• Drizzling the chocolate over your Halloween masterpieces can be difficult and messy sometimes. Try practicing on some plain extra nutter butters first or just on a plate.
• If you don't have Nutter Butter cookies, you could make mummy Milanos. Now that's a tasty cookie!
FREQUENTLY ASKED QUESTIONS
How do I store these spooky cookies? Store these in a zip lock bag, an airtight container, or in a dish covered with plastic wrap at room temperature/the fridge for up to a week.
How can I drizzle on the white chocolate easily? Try to practice on some of the extra remaining cookies. Slightly hold the bag in your hand and let the chocolate drizzle out itself. Practicing a few times on the other cookies will make it easier.
Can I make this easy cookie recipe gluten free? You could try to make these homemade by looking up a gluten free homemade nutter butter cookies. If you make the gluten free homemade nutter butters, then follow this recipe. Or for an easier alternative and just for taste, buy some of the store bought Simple Mills "Nut Butter Stuffed Sandwich Cookies" and dip them in white chocolate. You could maybe just do the mummy version on these they will be a circle.
Can I make these dairy free? Yes! You can easily make these dairy free since Nutter Butters are already free of dairy. All you need is a white chocolate alternative. I suggest Enjoy Life chips or Lily's. Remember, the consitency may not be as melted as almond bark, so you make need to use a little bit of oil to make it more dipable.
You might also like these cookie recipes
related recipes
Love this recipe? If you try it, be sure to tag me on @Instagram! You can also find me on Pinterest, YouTube and Facebook.
Easy Nutter Butter Spooky Halloween Cookies Recipe
Ingredients
- 1 package peanut butter sandwich cookies we used Nutter Butter which has 32 cookies
- 1 package almond bark or white candy melts
- 64 candy eyes
- 1 black food writing pen
Instructions
- Step 1: In a medium bowl that is microwave safe, melt your white almond bark according to the directions on the package. I melted about half the block of almond bark (extra for the mummy cookies). Once it is completely melted and smooth it is ready to use. Have your nutter butters out and prepared for the next step.
- Step 2: For the ghost cookies, dip half of the cookie into the white chocolate. I try to get both sides dipped and when I take it out I put it right side up and I let some of the white chocolate drip to get the ghost effect. Place on a cookie sheet or plate with parchment paper and add the candy eyes.
- Step 3: However, for the mummy cookies, drop the whole cookie into the bowl and cover it all with the melted chocolate. Usually I use a fork to pick it up, then tap a few times on the side of the bowl to get rid of excess chocolate and to give it a nice smooth look on top. Place on parchment paper with your ghost cookies and add the candy eyes at the top ish of the cookie.
- Step 4: Pop your mummy/ghost cookies into the fridge until completely cooled and harden. I would leave it in for about 15 minutes then just check just then with placing your finger on top to see if gooey or harden.
- Step 5: Once thoroughly cooled, use whatever access white chocolate you have left or microwave some more. Pour the remaining white chocolate into a zip lock bag. Zip up the bag with no air in it and cut a very tiny hole at the corner where all the chocolate is. Test to see if it is a good pouring consistently and the hole is big enough (you can also do this whole process with a piping bag if that is easier). Once it looks good drizzle all over the fully covered chocolate cookie avoiding the eyes. (For an easier tutorial check out the video at the bottom). For the ghost draw on a black ghost oval mouth with the black food safe pen.
- Step 6: Put back in the fridge again for about 10 minutes to let the mummies harden and enjoy!! Now you have the perfect Halloween treat to share with friends and family. Store them in an airtight container or a zip top bag at room temperature or in the fridge for a week!
Notes
Nutrition

Leave a Reply